Modules help maintain and display data that isn't appropriate for entry in a template or needs to be used across multiple Pages. A good example of content that should be stored in a module would be news. You may want to search for news, sort news, and use news articles on multiple pages of your site. Modules can help facilitate this through the five main module features:
- Views — Show the module's content in tables in the admin and provide actions for modifying the data
- Forms — Allow for adding and editing a module's content in the admin
- Embeddable Forms — Allow for front-end user submissions to a module
- Reports — Allow for structured searches and CSV exports of a module's content
- Classes — Every module has its own class which extends BigTreeModule and allows for adding, editing, deleting, and retrieving a module's content programmatically.
Creating A Module
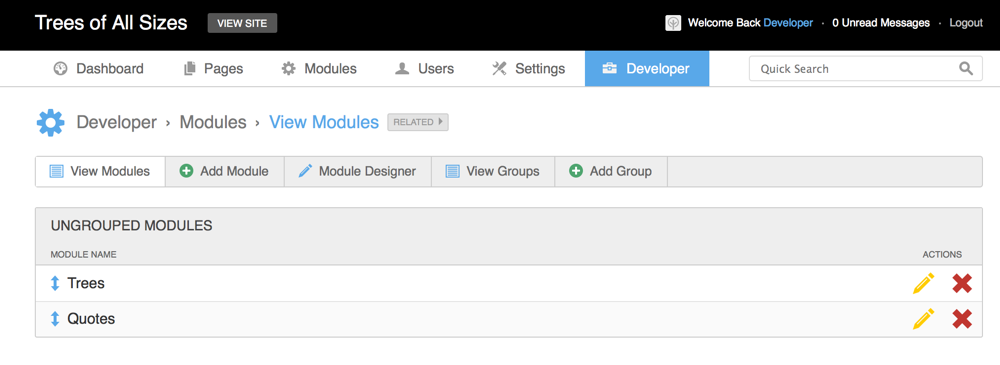
Begin by locating the "Modules" section in the "Developer" area of the admin. When you create modules, this is where they are displayed, broken down by group and displayed in a draggable list. Click "Add Module" and begin filling out the required information: a name for the module, the name of the database table you set up earlier and a class name (this is typically a camel-case name like MyClassName). You can also add the module to a group, choose an icon, and enable advanced user permissions the module.
For each module you add, BigTree will create a class file at ~/custom/inc/modules/{module-name}.php that contains the following:
<?
    class MyClassName extends BigTreeModule {
        var $Table = "my_table_name";
        var $Module = "1"; // the numerical id of your module
    }
?>
Create A View
Once you've created the groundwork for the module, BigTree will prompt you to begin creating the view. You can choose to program your view manually or you can click "Continue" to have BigTree guide you through this process.
The Item Title is populated for you, but you can change this if you'd like. The Data Table is automatically chosen as the same table from the module creation. This will likely be the case for your view but you have the option to choose another related table if it suits your needs. The View Type refers to how you want to present the list of data. Click here for a detail description of the different view types. The Preview URL option allows you to enter a URL for previewing your changes on the front end of the site. If a Preview URL is entered an additional clickable icon will show up in your view that allows a user to see the data with pending changes applied on the front end of the site. A "Save & Preview" button will also appear in the related form when a Preview URL is entered.
Any fields you created in the database table will appear as fields for the view. You may choose to remove any fields you do not want in your view, especially any that would have large amounts of content and would not be useful in a list view. If you update the table to have new fields and chose to edit the view, the new fields will show up as options in the dropdown menu.
You can choose to add or remove the ability to edit and delete the entries with the ![]() and
and ![]() icons. If you have the appropriate columns in your table, you may also see icons for approve, feature, and archive. Read more about reserved columns here.
icons. If you have the appropriate columns in your table, you may also see icons for approve, feature, and archive. Read more about reserved columns here.
Create A Form
BigTree will automatically fill the Item Title and Data Table entries, but you are free to change them.
You can provide a Return URL if you want your users to be redirected back to a special page after creating or updating a module entry.
You can also create functions to occur before (Preprocessing Function) and after (Function Callback) the process of creating or editing the module entry, if you have other actions to complete at these points. You can read more about module hooks here.
As in the view, BigTree will pull in columns from your table as resources for your form. There are many options for the field types that you can use in the form. You can read more about Field Types here. Click on the ![]() icon to change a field type's settings.
icon to change a field type's settings.